Wednesday, April 15, 2015

Seaside Part 3

It's taken a little bit but I did it, I stretched my workshop into five double page layouts!  My goal was to try to get three or four so I was pleased that I made it to five.  I was able to do this by using the front and back of the paper.  I used every scrap that was 1/2" and bigger.  I stuck to the stamps, inks, and dots for the workshop.  The fiber that was used was the only thing that didn't come with this workshop and I've actually had it for quite awhile so it needed to be used.

For the first layout I can fit four 3.75x4" photos on the Sorbet color cardstock.  I inked the edge of the cardstock too.


On the Pear cardstock you can fit two 3.5x6" photos.  One 6x3" on the Desert Sand, and one 3x5" on the Colonial white.  Or you could do two 3x3" photos on the Desert Sand.


For this layout you can fit three 4x6" photos on the left and two on the right.  As well as two 3.5x3.5" photos on the right.


For the last layout I used the stamp that looks like a net to make a background design.  The left page can fit one 4x6" photo and one 4x3.5" photo.  The right can fit one 4.5x4.5" photo and one 5x7" photo.  I also added a small journaling scrap.


The measurements are for the size of the photo not the size of the paper.  Those sizes could always be adjusted to how much of the photo mat you prefer to show.  I usually leave 1/4" showing around the photo.

I hope this has shown you that scrapbooking can be as much or as little as you want!  The workshop is a great option for stretching your money on supplies.

Tuesday, April 14, 2015

Blossom Birthday Card

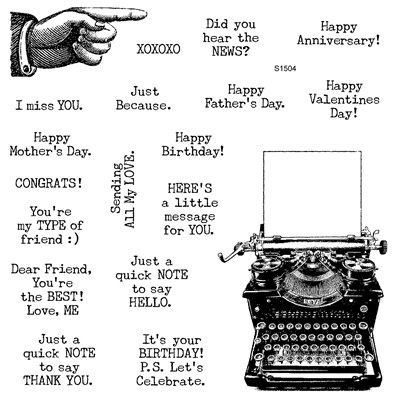
I created a Birthday card last week for a friend.  I haven't created a lot of cards but I wanted to see what I could come up with using the new Blossom paper and the Stamp of the Month for April, Typed Note.  My lighting isn't the greatest here, but here it is.  I over think stuff all the time and told myself during nap time that I would go and just see what I could come up with.  I didn't let myself get hung up.  I just kept saying keep going and let the creativity flow, then if I don't like it I can always start over.  This isn't a difficult card so it didn't take me very long.

I wanted to use colors that all coordinated so I used the colors from the Blossom paper.  I used Sunset, Pear, and Juniper inks.  The diagonal striped paper is a zip strip, then I added a scrap with a dove tail end, and finally a piece of teal shimmer trim.  


The Stamp of the Month is just $5 with a $50 purchase and if you are purchasing a grab bag that counts towards that amount!

Here's are all the stamps included in the Typed Note stamp set:


Saturday, April 11, 2015

$35 Deal of the Day grab bag

My $35 grab bag that I ordered on the 2nd arrived!!  I didn't pay for upgraded shipping and with the storms the last couple days the shipping was a little delayed.  I was so excited to see what I got!


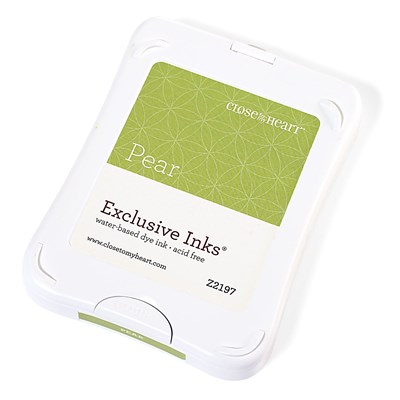
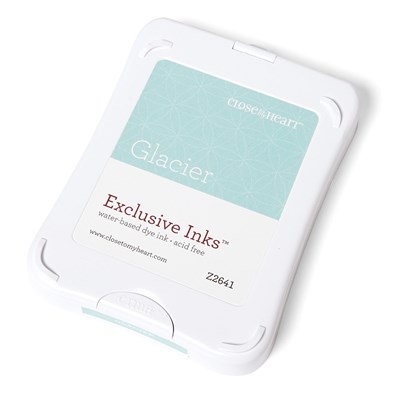
Since you only have to order one full priced item to be able to purchase the grab bag, I chose an ink pad.  I also added a Seasonal Expressions 2 catalog for free.


Here's the contents and there's some really great stuff in here!  The stamp set is from a scrapbooking workshop, so that's an exclusive set that you could only get by purchasing the workshop.  I'm already picturing Mother's Day cards with that stamp set!  Later skater Picture My Life cards from last year.  The green chevron bags are a retired item too.  Everything else can be found in the current catalog.  The only item that I don't know the price of is the green bags.  But when I had totaled everything else up not including that price I was already at over $70 in product!!  What a deal.  I have another one coming that should be here soon too and I'll do a preview of that also. If you aren't already a fan of Close to my Heart on Facebook give them a like.  They will be doing sneak peaks of different products that could end up in your grab bag!


Remember each day is a different deal and different price point.  Also multiple bags may not contain the same items.  Check out my website for your chance to get yours!

Saturday, April 4, 2015

Seaside Workshop on the go, Part 2

Here is the second two page layout from the Seaside workshop on the go.  For this layout I used the additional layout shown in the guide as inspiration.  I stuck with greens and blues again just because that's what I'm drawn to and that's the color palette that comes more naturally to me.  I actually struggle with making feminine pages and find making pages with just one photo on them a challenge.  But I do like to try new techniques and push myself out of my comfort zone so all my pages aren't the same.  The original layout had all the photos vertical.  I don't take many photos that way, but figured even if I don't end up with vertical photos for the right page I can alway use the extra space for journaling below a photo.  I really wanted to figure out a way to use just one sheet for the background and accent paper.  So I cut it smaller than the recommended sizes that way I could stretch my workshop.  The piece I'm referring to is the striped paper and the brown herringbone pattern is on the back side.

After I created this I still had two full 12x12 pieces of paper and a few other good sized pieces of the other sheets.  My problem I'm now debating is that none of my background pieces will match.  Although I'm okay with that, since all the papers are from the same collection.  It's just a bit more challenging!  

You can see a crease on the close up of the Oh what a feeling stamped image, but since that stamp kind of looks distressed I figured that it would be okay.  That was another piece the little guy got his hands on.  The paper with the sunglasses and cameras are stamps from the set.  The chicken wire stamp in Glacier was used to create the border along the bottom.  The best part was it didn't have to be lined up perfect, it could just be stamped however and look great!  The be right back and happy place are stamped images that have been cut out.  The three other little sentiments on the top right, of the right page are just cut from the zip strip.  I talked about the zip strips in my previous post on Seaside.  All in all this page is actually a great example of how you don't have to spend a ton of money to create something you like!  


I'm just getting into stamping and it's a great way to add something extra that coordinates perfectly.  If you would like to try something like this out but you aren't sure where to start, I'd love to set up a gathering or a workshop and show you how!  You can contact me through my website or leave a comment below.


Friday, April 3, 2015

Seaside Workshop on the go, Part 1

There are several Workshop on the go sets between the Annual Inspirations and the Seasonal Expressions 2.  Which by the way has some awesome new products!!  Going back to the idea of the workshops, there are card and scrapbooking workshops but I'm just going to focus on scrapbooking for this post.

 The workshop comes with quite a bit and you're still left with a good amount after completing two, 2-page layouts.  The guide that comes with it will tell you all the supplies needed, and the measurements for cutting the paper as well as tips on creating specific techniques!  It takes all the work out of it.  This is great for someone who thinks that they aren't creative.  You will be shown how to create the layout using Cricut cuts, or if you don't have the Cricut cartridge it shows how you can create a layout without the cartridge.  Plus it provides you with an alternative layout idea inspired by layouts in the idea books!  You don't have to make the layouts exactly the way they're shown too.  If you tend to take more horizontal photos, adjust the layout to accommodate your particular photos.  The stamp set included is a full D-size set, and it's exclusive to the workshop.  In fact, that's the only way to get that particular stamp set.

If stamping doesn't interest you the paper packs are available and you can always purchase the complements or other embellishments separately.

PRODUCT DESCRIPTION

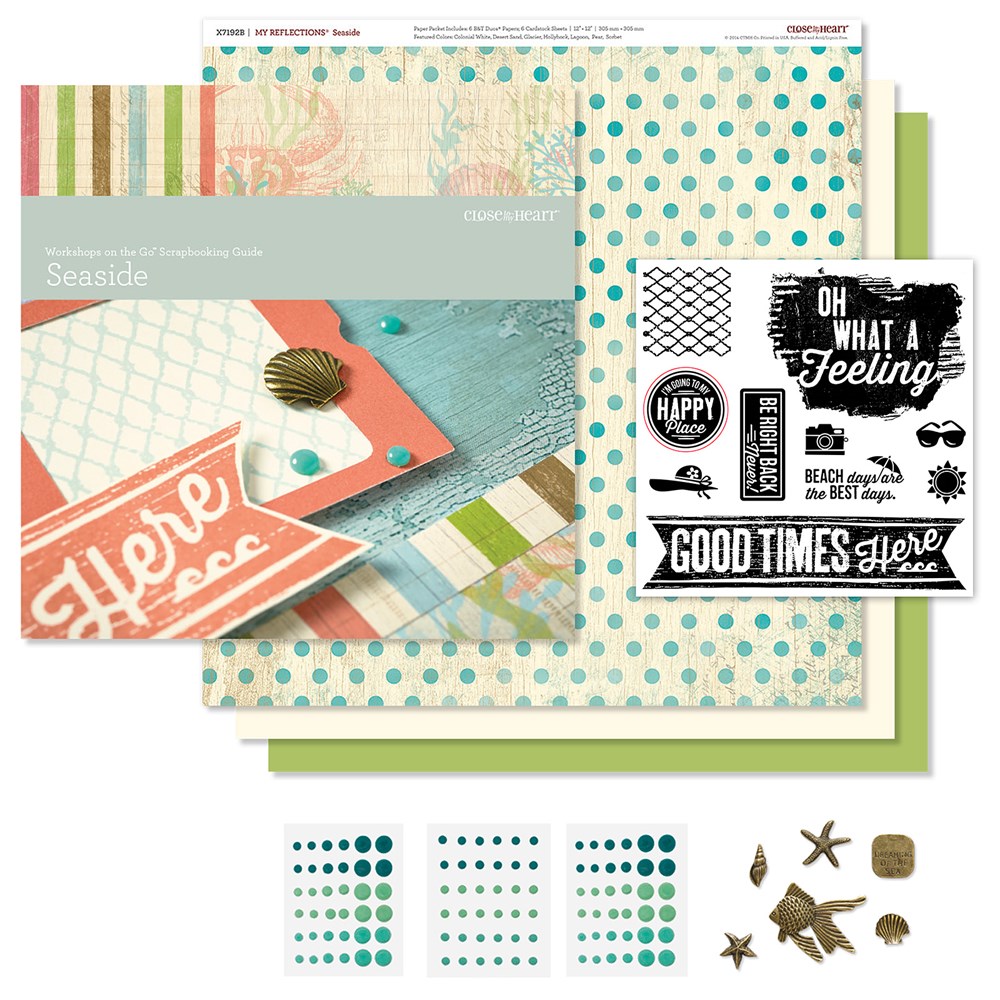
Workshops on the Go&® Seaside Scrapbooking Kit Contents
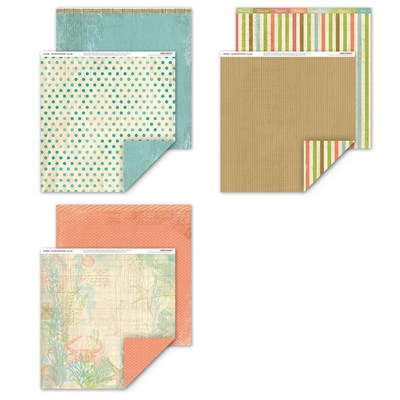
1 – My Reflections™ Seaside Paper Packet (X7192B)
1 – My Acrylix® Seaside Workshop Stamp Set (D-size)
2 – Cardstock Sheets (1 Colonial White, 1 Pear)
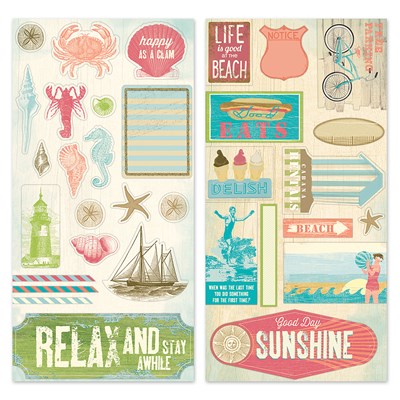
1 – Seaside Assortment (Z3014)
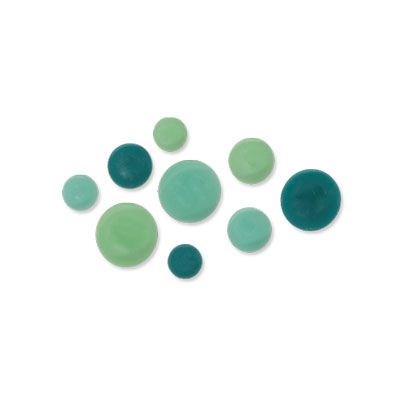
1 – Aqua Dots (Z1853)
1 – Instructional Brochure
Featured Colors: Desert Sand, Glacier, Pear, Sorbet, Colonial White
Use the material and instructions in this kit to create two beautiful 2-page layouts.
Stamp images outlined in red coordinate with the Cricut® Artbooking collection (Z1906).

Here's my first scrapbook layout and it's from the Seaside Workshop on the go.  I'm in love with these papers!  Everything can be used and you aren't going to have a ton of wasted product.  Even the little zip strips that are the 1/2" of paper that has the logo and other information about the paper set, on the other side there are different patterns that can be used!  The beach and being around the water is one of my favorite things so this workshop was perfect for some beach photos from last summer.  Luckily the papers survived multiple attacks from an almost two year old ninja.  So please ignore any creases or weird bends in the paper, thanks.

I used Pear and Glacier inks in place of Sorbet, because I thought I had that color and I don't.  *Double check your supply stash before placing an order for new stuff.  When I'm deciding how to cut my paper for a layout I like to use the rule measure twice, cut once.  Mostly because I've got kids playing beside me or I'm multitasking while scrapping, which I don't recommend.  I followed the guide pretty much for this layout and used their cutting measurements.  The only thing I did differently was adjust my Colonial White cardstock so that I could use just that one sheet and save the other one for the other layouts.  I chose to do it this way because I'm attempting to get three 2-page layouts from this workshop, more to come on that later.  On the right page for the Polaroid looking pieces, I only put a piece of foam tape along the bottom for now.  That way it'll be easier to get my photos in position and then I'll add the adhesive and foam tape.  I really liked the idea the guide had of cutting the journaling area up and matting it.  I've actually never done that before now, and it was really simple to make.


I hope you liked the layout and it inspires you to create something pretty today!  For more information check out my website.


Tuesday, March 31, 2015

Deal of the Day in April

Okay, I'm super excited about what is to come for the month of April. Love a great deal? How about 30 days of great deals? During the month of April, you have the opportunity to score a deal every day with Close To My Heart!


Each day during April, while supplies last, they will feature a random grab bag filled with current and retired Close To My Heart products available for purchase at a major discount. To grab your bag, simply place any current, full-priced item in your online shopping cart through www.justineharris.ctmh.com and you will then be eligible to purchase as many grab bags as you wish (while supplies last)!

So let's get down to the good info!  Grab bags will be featured at five different price points throughout the month.


different price tiers will be available randomly throughout the month!
  • $35 USD/$55 CAD Grab Bags
    (On average, a $70 USD/$75 CAD value!)
  • $50 USD/$65 CAD Grab Bags
    (On average, a $90 USD/$92 CAD value!)
  • $75 USD/$85 CAD Grab Bags
    (On average, a $140 USD/$145 CAD value!)
  • $115 USD/$125 CAD Grab Bags
    (On average, a $240 USD/$250 CAD value!)
  • $150 USD/$160 CAD Grab Bags
    (On average, a $325 USD/$335 CAD value!)
Some grab bags will contain product with more than DOUBLE the retail value of the price you pay! Grab bags will be available for 24 hours starting at 3 pm MDT each day and only while supplies last—so visit often and early! Remember that grab bag tiers will be featured on a random schedule throughout the month, so seize the opportunity to purchase from the grab bag tier you’re interested in when it becomes available because it might not come around again!

You may have some other questions about the grab bags and hopefully the following information can answer them.


What do I have to do to qualify for the grab bag of the day?
The only thing you need to do is purchase any current, full-priced product on your OBA. Once you have placed your qualifying product in your cart, regardless of dollar amount, the campaign offer will trigger. If the qualifying item is removed from the order, all grab bags will be removed as well.


Are there any Close To My Heart products that do not count toward a qualifying purchase? Yes. Purchases made in Studio J® do not count toward a qualifying purchase; this includes layouts and JPG files. Also, discounted items purchased online under the “While Supplies Last” category do not count toward a qualifying purchase. Additionally, clearance, bulk, and supply items do not count toward a qualifying purchase.


How many grab bags can I qualify for in a single order?

There is no limit to the number of grab bags you can purchase—either on a given day or throughout the month. Once you have placed a qualifying item in your cart you will be able to add as many grab bags as you wish (as long as they are available). Please see questions 15 and 16 for more information on grab bag availability.

Are grab bags available “while supplies last” each day?

Yes. If a certain price tier sells out during the day it is offered, no more grab bags will be available for purchase for the remainder of that day. However, that same price tier may still be available on a different day later on in the campaign; but then again, it might not—that’s part of the fun!

*Offer valid April 1, 2015 (3:00 pm MDT)–May 1, 2015 (2:59 pm MDT). A given grab bag offer will only be available for 24 hours each day starting at 3:00 pm MDT through www.justineharris.ctmh.com. Tax and shipping/handling will be charged based on the amount actually paid for the grab bag(s). Amounts paid for grab bag(s) are not eligible for Gathering totals and Hostess Rewards. 

Monday, March 23, 2015

Good deals ahead

  My last post mentioned that I had recently signed up to be an Independent Consultant with Close to my Heart.  So I wanted to talk about that decision.  I'm a stay-at-home Mom, I was going to school right up until two days before our youngest was born actually!  I have about a year left before I will finish my degree.  Until then, I stay home with our youngest, and take care of all the other duties that come with that.  I never pictured myself staying home when I was younger, but I really like the consistency it gives us.  My Husband runs his own Drain Cleaning business and goes to school too!  So his hours can be pretty hectic.

  One of the first crops that I had attended after moving here in 2009 had a few vendors.  One of them being Close to my Heart.  Another vendor there was talking about why they didn't like stamping and how it was so messy.  I didn't like the idea of that, I don't want to get ink all over me.  So I never really gave the company a chance.

  Then in October last year, I was invited to a home gathering.  I wasn't sure what to expect but thought this would be a good way to check out the products without feeling like I had to buy something.  I had no idea that when you host a home gathering that you get to make something.  Okay, bonus because now I get to use the product and really check out the quality without buying it first!  We made a cute little thank you card.  I was SO impressed!  The the paper was heavier and the ink didn't bleed through to the other side.  The acrylic blocks are thicker than the ones you can buy at a craft store.  Since they're thicker they have nicely curved ends to easily hold the block without getting ink on your fingers.  They also have a line so you can line up letters to stamp words evenly.  The inks really impressed me though.  Not only did I NOT get any ink on my fingers or hands, but the ink dries once it's stamped! I rubbed my hand over what I had just stamped and there was no smearing, smudging, or ink anywhere it shouldn't have been.  At this point I was really excited about what this company had to offer.  Then the consultant showed us an album with some of her artwork.  I had never heard of flip flaps, or seen them used in an album prior to this.  This was a product that I needed in my albums!  No more creating another two pages for a couple photos that wouldn't fit on the layout.  No more trimming them to an awkward size to fit on the page.  Gone were those days, because this product just gave me hundreds of other possibilities!!  Not once did I feel pressured during that party to make a purchase.  Of course, I did end up placing an order at the party and asked to take a catalog home.  For the next few months I looked through it and considered signing up.  I was hesitant because I had tried direct sales before and wasn't sure it was for me.  Plus with all the time that my husband is working, I wasn't sure there'd be time left for me to try this venture.

  So after debating for a few months and talking it over with my husband, I was ready to sign up.  They offer two different kits for $99 each plus shipping and handling, you choose either the scrapbook kit or the card making kit.

Scrapbook kit

Card makers Kit

As if that wasn't a good enough deal, I got the shoulder tote for FREE!!  Just for signing up in March. That campaign is good until March 31st.  Also new consultants who remit $300 in commissionable sales within their first 40 days after their new consultant kit ships will get the rolling tote (retail value $149.95 USD/ $164.95 CAD) as a FREE bonus (not including shipping and handling)!!!


  So if you would like to get your paper crafting supplies at a discount, you should check it out and see if it's something that would fit well with your life.