Showing posts with label diy card. Show all posts

Wednesday, January 31, 2018

How to books

  Today's topic, are the how-to books from Close to My Heart.  There are four volumes, with three and four being the most recently released within the last year.  Volumes three and four are packaged differently than the older volumes.  You slip these volumes into an Everyday Life album.  They're a convenient size and lay flat or could be propped up to easily view the instructions.  So why would someone consider purchasing one of these books when there's Pinterest?  I love Pinterest just as much as the next girl and enjoy pinning beautiful artwork that inspires me.  However it's easy to get lost down that rabbit hole and lose a lot of your time.  Your time is valuable and most people say I don't have time to be creative.  Or I could never make something like that because I'm just not a creative person.  I'm going to let you in on a secret, even creative people experience a block every now and again.  Well these books are there to help you move past that!


  So let's move into the details of these books and why they could help you.  Volume three has 36 two-page layout patterns for standard photo sizes.  As well as artwork that shows you how to include Pocket Plus pages.  The measurements are included and easy to read to create the layouts.  They also have two different completed layouts pictured so that you can see how the layouts can be used for any theme.  Each one also features creative tips on how to create special features on a layout.  Using standard photo sizes (4x6, 3x3, 3x4,...) are what takes your layout up a notch.  It provides a more cohesive look to your layout.  But sometimes you happen to take a lot of pictures at an event and would like to include them all in the one layout.  That's where the Pocket Plus pages come in!  There are multiple sizes and photo configurations available.  *So here's a tip:  if you are looking to print a 3x4 photo in landscape or portrait.  Download the Project Life App from the App Store.  It was only $2.99!  In the app you can fit two 3x4 pictures on a 4x6 layout, then you save it and have it printed wherever you purchase your prints.  This also helps to cut down on the cost of printing.*


  Volume four has 24 patterns to create cards for any occasion in the standard 4 1/4"x5 1/2"size.  Again there are two artwork samples and creative tips for each card shown too.  Cards don't come as naturally to me so having this is such a valuable tool.  The measurements are listed for the cards too.  I don't have a large amount of cards on hand but I can say that my stock has come through on several occasions.  When you realize that you forgot to pick up a card or you have a last minute thank you to mail out it can be annoying to have to drive back to the store just for that item.  It's nice to have them all ready to go, an added bonus is that being homemade adds a personal touch.


  I hope that you find this helpful to take a closer look at what's inside these How-to books.  Having a creative outlet is a great way to relax and have fun with your friends and having the right tools can help you with that.  If you have any questions please let me know!  

Sincerely,
Justine


Thursday, July 13, 2017

Retiform

Hey everyone,
  Yesterday someone on our team page posted a card that used a technique called Retiform or Grid technique.  I had never heard of it before but it looked really cool.  So of course I turned to my go to crafty research app Pinterest!

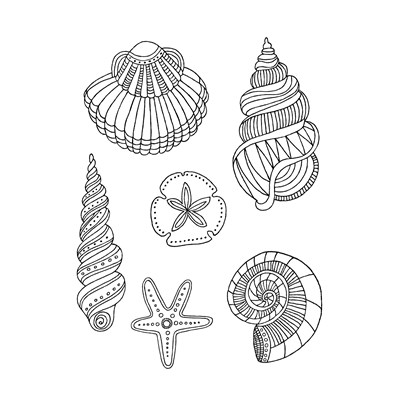
  This technique really isn't difficult.  I'm not advanced at stamping, I'm still learning and have a long way to go.  So for this technique I chose a beach theme because I needed to make my SIL a birthday card and she loves the beach.   So I gathered my No Worries, Swirly Seashells, and Birthday Sparkles stamp sets.  I cut my white Daisy to 5x3 3/4".  The Seaglass is cut at 5 1/4"x4".  You'll also need a sponge dauber, two inks, a scrap of paper that has a longer straight edge, and some post it notes. This post is really photo heavy but you'll be able to see how easy it is.  Some tips that I have are that you have to watch if the ink is soaking through the post it note so you might want to try to use an additional scrap of paper.  I am going to try that myself next time just to see which I prefer to use.  The inks that I used were Sea Glass and Juniper.


  Here are the two cards that I created with this technique.  I used foam tape for a little dimension on these cards.  


  If you have any questions feel free to ask.  I've linked some of the products that were used below, or you can find more products on my site at justineharris.closetomyheart.com.   Thanks for reading.

-Justine

            Swirly Seashells                                No Worries
product imageproduct image
       Sea Glass cardstock                                     3-D foam tape
product image
product image

              2"x2" block
product image

Wednesday, August 5, 2015

Wedding card

I've only made a couple wedding cards, including this one.  I do know that I love the white on white style cards!  To make this I used the quatrefoil embossing folder on a 5"x5" piece of white daisy cardstock.  I tied the ribbon around the piece and used some liquid glass under the knot to keep it in place and under a couple small spots that would be covered by the layered piece.  Then the 3"x3" piece was embossed with a flower embossing folder I have and layered on the 3 1/4"x3 1/4" piece.  I used the shower flower occasions stamp set for the sentiment, and finished with some clear gems.  I've been trying to make sure that I stamp the inside of cards to really finish them off.  For the inside I used the August stamp of the month, using smokey plum (retiring Aug 31st) and slate inks.


Links to products used in the making of this project:

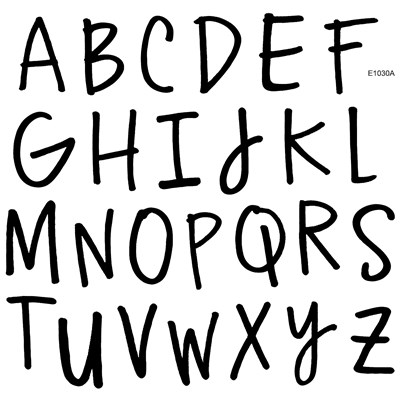
            Handwritten Print


Flower Shower                                        Slate                                 

   
   Smokey Plum *Retiring 8-31-15      White Daisy Cardstock

Wednesday, July 15, 2015

Shimmer Trimmed cards

I'm loving shimmer trim!  These were a project from a meeting that I never got around to creating.  I did take a lot of inspiration from a fellow consultant Sara Batkin.  She's amazing and I have learned a lot from her!  

When Corporate gave us the project they gave us all the small pieces of card stock precut.  All the patterned pieces are from a My Crush book that we took apart!  I love thinking outside the box like that.  I never would have considered taking one apart to create cards or even scrapbook layouts.  I'll have those for you next.  Below are the cards that I created.  


The cards are 5.5"x4.25".  I really enjoyed making these cards.  I'm trying to get into more of a groove creating more often.  I always say our hobby is preserving memories and making heartfelt crafts not buying pretty stuff to sit on a shelf!  

The card below was inspired by a recent baby announcement.  They are having a boy but I thought how perfect because babies are such a wonderful gift!


Every now and then I happen to craft while the kids are awake.  That also happens to be when I make mistakes and have to come up with something to fix it.  For this card I asked  my 6 year old what color combinations he liked best and what ink colors he thought I should use.  I like to see what my kids come up with because sometimes their ideas work out really well!


For this card I used liquid glass on the centers of the flowers.  I really like how it adds something but isn't over the top.


The piece that says love is vellum.  This is one of those cards that had an accident but you would never know.  I had already attached the background paper to the card base.  Then I attached the vellum piece, only I was watching and talking to the kids.  So I attached it to the side that opens, it was upside down. Then I tried to gently pull it off and ripped it!  So that wasn't going to work.  I just decided to cut the card in half and save the work I had done.  I added the navy piece and shimmer trim to hide the tear and the adhesive.


If you have any questions let me know or visit my site for any of the products that you like.


Tuesday, June 9, 2015

Teacher Thank you cards

It's been forever since I've posted anything and honestly I haven't had a chance to work on much since April.  The end of April and all of May are usually busy, but this year was insane!  Filled with Birthdays (two of the littles plus mine), a girls trip, our Anniversary, Mother's day, a Wedding, a graduation party, football and baseball.

So that brings us to June.  My kids have a day and a half left of school.  As in, 11:45 Thursday, they are done for the summer!  So nothing like waiting until the last minute to make some Thank you cards for their teachers.

This was my current desk situation today. 


Since I'm still fairly new to stamping, I like to practice before I stamp directly onto my project.  I'm actually really glad I did too, because I'm still figuring out which color is the best to stamp first the lighter or darker.  Plus it helped to season this new stamp set.  This is what I came up with and I really like it!  


 First, the card is 5 1/2" x 5 1/2".  I cut the base yellow piece 5" x 5".  The white stamped piece is 4.75" x 4.75".  For the stamping I stamped the lighter, petal colors first.  Then stamped the outline in black.  I love the look of this it almost reminded me of the way water colors look.  My stamping was a little off on the pink but improved with the other ones!


To make the outline stamping easier I would look for a point that stands out to you and focus on that.  For me it was the curved tip on the bottom petal.


I used a small bit of liquid glass behind the knot to keep it in place.  Then foam adhesive to pop it off the background.

Hope you enjoyed this!


Supplies I used for this project:

A Budding friendship                           Have a Happy day                    Glacier
       

Canary                                                      Pixie                                               Black