Showing posts with label liquid glass. Show all posts

Thursday, August 9, 2018

Accordion mini album

This album is really easy to make.  I found the instructions on Pinterest to create an accordion album.    I used these instructions. The only thing I changed was using additional pieces of card stock to cover the backside of the thin cardboard I used for the front and back cover.  This would be a personal preference.  I think it gives it a more finished look to not be able to see the cardboard when you open up the album.  It will stick out a little since the covers are cut bigger.  I just used a cereal box for the cardboard.  This album uses the Documented paper pack.  It's a great way to create a small brag book or gift for someone.  


Supplies used to create this project are:

If you have any questions on creating this feel free to comment below.  Also would you prefer if I take photos while creating in addition to the finished project?  Please comment and let me know that too.  Thanks!

~Justine

Wednesday, August 2, 2017

Photo display

  Earlier this year Close to My Heart put out a wreath kit.  The base was made from a thick chipboard.  I've been trying to figure out what I wanted to create with the center piece from that kit.  So after mulling over ideas for months I finally decided.  You'll notice that's a trend with me.  I take forever to research and finally make a decision but I like to be thorough.  I have a plate display from my Grandma that I've been waiting use.  Using several new products from Close to My Heart I set out to make a photo display.

   I painted the circle with black and blue acrylic paint.  At first I tried my water colors but they were too light so I painted right over it.  I used the new constellations stamp set and heat embossed the images using white or silver powders.  I use VersaMark ink when I heat emboss.  I used the new family thin cut to cut out the word family.  There are various papers mixed from the brand new basic fundamentals and enchantment fundamentals  lines.  The embellishments are are mix of things I have in my stash.


  I love showing people how to be consumable with their crafting stash.  This project would be a good gift too!  You could do a theme from a trip, or even a holiday.  I'd like to try this next with an embroidery hoop and material or paper to see how that would work.  I'd love to hear if you plan to try this.  As always you can check out these products and all the new stuff on my site at www.justineharris.ctmh.com.

Sincerely,
Justine 

Wednesday, April 6, 2016

My Top 10 tools.

Let's talk basic tools. I'll say favorites or most reached for because I can't say must haves since we crafters feel like we need them all or at least I do! I have many other tools that I use but these are definitely the ones that I would have to have if going to a crop. I find myself reaching for these the most.


1. Paper trimmer- There are MANY different trimmers on the market but I really like my Fiskars one. It has a wire cut-line indicator. I've read mixed reviews about the wire, but I have read great things about the company replacing the piece that holds the wire should it break! Customer service is really important in this day and I like companies that stand by their products.

2. Scissors- I've owned many pairs of scissors but the non-stick micro-tip scissors from CTMH are simply the BEST! These scissors never gets sticky stuff all over the arms and have issues sticking while trying to cut. They are perfect for fussy cutting (cutting out your stamped images). I've used them every single time I've crafted over the past year since getting them and they are just as sharp as the day I got them! Having little ones I really like that they have a cover to slide into in case someone decided to venture into the craft room. Even keeping my stuff put up at our old house, our youngest is very curious and would climb to get to things.

3. Ruler- I'm not sure if most people use one as often as I do. I like to measure twice and cut once. I think that this helps cut down on waste. I don't waste as much paper and can use up my scraps more efficiently.

4. Adhesive- I have multiple types of adhesive! Tape runners, glue dots, bonding memories glue, liquid glass, foam tape, and scor tape. I like them all and use them all for different projects. Tape runners are quick and easy when assembling cards or layouts. Glue dots are great for embellishments. Bonding memories glue comes in different size tips. When the glue is wet it's permanent and when it's dry it's temporary. This is great for assembling cuts from the Cricut. Liquid glass is AMAZING! A fellow consultant calls it "the woman's super glue." This adhesive can be used to decoupage projects. It can be used for embellishments too. Plus you can put it over top of images you stamp to give it an epoxy look. Foam tape can be cut to any size needed. You can use it to pop a stamped sentiment for cards or pop up an embellishment on a layout. Sometimes it's nice to give your projects dimension to break it up. Scor tape is an adhesive double sided tape.
 

5. Craft mat- CTMH has two different mats. I'm looking to purchase the all-purpose mat soon. I've had the chance to make projects on one while stamping at a unit meeting. You can just wipe the mess right off the mat! People mix water color paints on it, and use it for heat embossing. It's heat resistant up to 240 degrees Fahrenheit, and has a non-slip underside!

6. Corner rounder- Ever since I was little I loved the round corners of my Grandma's vintage photos. This is definitely a tool that I've used since I first started scrapbooking.
7. Blocks- I have found it helps to have a variety of sizes. CTMH has recommended sizes for blocks for each stamp set too! The sides have rounded grooves to hold the blocks easier and keep your fingers out of the ink. They also have a line across one edge on the stamp side to allow you to line up letters or a phrase.

8. Journaling pen- I think that at a minimum you need a black and white journaling pen. I used to use tons of other colors. I don't as much anymore. I find that I've found a favorite black and white pen. I use them the most often.

9. Sponge or Daubers- CTMH's round sponge can be cut into 8 sections to use for different colors. Daubers are great too. You can either use one per each color or you can wash them when your done and let them dry out too. Both of these can create different textures on your creations. They can be used to distress the edges or give a realistic look to plants.

10. My acrylix spritz cleaner and stamp scrubber- These are essential for cleaning your stamps when done using them or in between colors. I've tried using baby wipes but you have to make sure they are alcohol free, plus they can leave fibers on your stamp. Then when you go to stamp you'll have a fibers that is heavily colored and leaves a line across your image. The spray really does last and you can purchase refill bottles.

*Bonus- An organizer to carry those tools in!

What are your favorite or most reached for tools?

~Justine

Wednesday, August 5, 2015

Wedding card

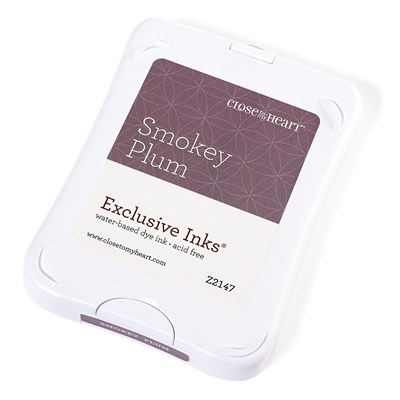
I've only made a couple wedding cards, including this one.  I do know that I love the white on white style cards!  To make this I used the quatrefoil embossing folder on a 5"x5" piece of white daisy cardstock.  I tied the ribbon around the piece and used some liquid glass under the knot to keep it in place and under a couple small spots that would be covered by the layered piece.  Then the 3"x3" piece was embossed with a flower embossing folder I have and layered on the 3 1/4"x3 1/4" piece.  I used the shower flower occasions stamp set for the sentiment, and finished with some clear gems.  I've been trying to make sure that I stamp the inside of cards to really finish them off.  For the inside I used the August stamp of the month, using smokey plum (retiring Aug 31st) and slate inks.


Links to products used in the making of this project:

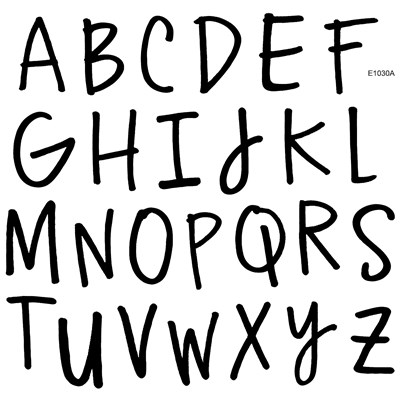
            Handwritten Print


Flower Shower                                        Slate                                 

   
   Smokey Plum *Retiring 8-31-15      White Daisy Cardstock

Friday, July 17, 2015

Brushed WOTG

I just created the first layout for the Brushed Workshop on the Go.  My exact thoughts after finishing and standing up to take a better look were "did I really just create something this beautiful?"  I'm not trying to sound full of myself at all, but man does it feel good to improve your techniques!  I've stated several times that girly is not my comfort zone at all and I've been working to get my stamped images to come out more crisp.  For this workshop I scoured Pinterest for Inspiration, you can find my board here.  I found a great layout that didn't seem to difficult to recreate and adapt to what I like.

I think this is really important to search for your artistic inspiration and try to imitate that to improve your skill.  You don't have to scraplift the entire layout if you don't want but start with the basics and let it evolve from there.  What I mean by this, is I decided to use all the same papers as the original and keep the majority of the project the same.  As I went along I made some changes to my embossing folder used on the canary paper (yellow).  Also I tend to take more horizontal photos so I changed the orientation of the matts on the right page.  This layout did take me longer because I stamped a lot more. I hope you like it!  If you would like that feeling or to learn how to create something like this contact me and I'd love to have a get together with the girls!