Showing posts with label flowers. Show all posts

Thursday, April 14, 2016

Oh so happy

  I've been working on a two page layout for my crop attendees.  I happened to have a decent stash of Blossom paper left and it's a great spring time paper.  I'm really happy (haha) with how it turned out!  I used Glacier, Lagoon, Sunset, Sorbet, and Pear inks.  There's a little strip of Kaleidoscope in there too.  I also used a masking technique for the first time to create a layered look with the flowers.  

  I recently had a conversation with a friend about scrapbooking and she said she's been told many times "there's no right or wrong way to scrapbook."  That she gets frustrated when things don't look perfect.  I can agree with wanting your pages to look perfect when you get done.  I'll be honest, I've scrapbooked for 10 years and I usually mess something up every time!  It's rare for me to scrapbook when the kids aren't around, so that's usually when mistakes happen.  Today I stuck a paper down before it was lined up straight so when I pulled it up it ripped the paper a little.  But you can't tell because I covered it up once I got the paper on correctly.  I was supposed to stick the green Kaleidoscope strip down before I stuck my photo mats down.  Of course I didn't notice until after so I just cut little pieces and stuck them where they would be showing had I put it down correctly.  Also one photo mat is off center, but you know what?  When you look at the whole thing all together those flaws fade away.  Why?  Because it's about the photos and the memories and the person documenting them.  Scrapbooking is an artistic expression of how you want to document your memories.  Flaws, imperfections and all!  
 
  I'd like to challenge you to relax and enjoy the process.  Also, if you make a mistake embellish it or cover it up :)


~Justine
Products used to create this layout:


Thursday, March 24, 2016

Hello Paradise!

So a couple weeks ago Close to My Heart had it's incentive trip which was a lovely cruise.  No, I didn't earn it but I can dream and work towards the next one!  When you go on the incentive trips the company creates an exclusive stamp set for that trip.  Well this year they decided to make the stamp set available to everyone through the month of March.  The trip earners set included the names of the ports where they stopped.  I'm so excited because this set is so awesome, plus you can use it towards Stampaganza!!!


How could this get any better?  They released layouts using the stamp set, 10 to be exact!  Woohoo, and they are gorgeous too.


Get this one before it's gone.  Maybe if I create cruise layouts I will just have to go on a cruise to have photos to fill them :)

~Justine


Wednesday, August 5, 2015

Wedding card

I've only made a couple wedding cards, including this one.  I do know that I love the white on white style cards!  To make this I used the quatrefoil embossing folder on a 5"x5" piece of white daisy cardstock.  I tied the ribbon around the piece and used some liquid glass under the knot to keep it in place and under a couple small spots that would be covered by the layered piece.  Then the 3"x3" piece was embossed with a flower embossing folder I have and layered on the 3 1/4"x3 1/4" piece.  I used the shower flower occasions stamp set for the sentiment, and finished with some clear gems.  I've been trying to make sure that I stamp the inside of cards to really finish them off.  For the inside I used the August stamp of the month, using smokey plum (retiring Aug 31st) and slate inks.


Links to products used in the making of this project:

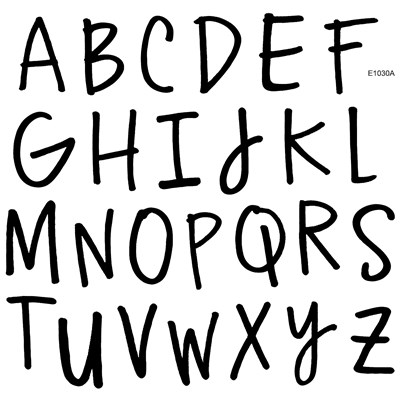
            Handwritten Print


Flower Shower                                        Slate                                 

   
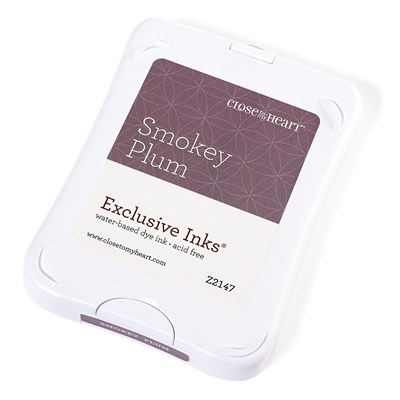
   Smokey Plum *Retiring 8-31-15      White Daisy Cardstock

Tuesday, August 4, 2015

Brushed WOTG layout 2

This was the second layout that I came up with to go with the Brushed WOTG.  The stamp set used was last months stamp of the month.  I still have tons of paper left to create a couple more layouts from the workshop.  I haven't really gotten around to it since we went camping and then had a wedding to attend.

If I were to recreate this I think I would have added a couple of white squares to the left page to seem more balanced since I didn't have anymore of that color.


Friday, July 17, 2015

Brushed WOTG

I just created the first layout for the Brushed Workshop on the Go.  My exact thoughts after finishing and standing up to take a better look were "did I really just create something this beautiful?"  I'm not trying to sound full of myself at all, but man does it feel good to improve your techniques!  I've stated several times that girly is not my comfort zone at all and I've been working to get my stamped images to come out more crisp.  For this workshop I scoured Pinterest for Inspiration, you can find my board here.  I found a great layout that didn't seem to difficult to recreate and adapt to what I like.

I think this is really important to search for your artistic inspiration and try to imitate that to improve your skill.  You don't have to scraplift the entire layout if you don't want but start with the basics and let it evolve from there.  What I mean by this, is I decided to use all the same papers as the original and keep the majority of the project the same.  As I went along I made some changes to my embossing folder used on the canary paper (yellow).  Also I tend to take more horizontal photos so I changed the orientation of the matts on the right page.  This layout did take me longer because I stamped a lot more. I hope you like it!  If you would like that feeling or to learn how to create something like this contact me and I'd love to have a get together with the girls!


Thursday, July 9, 2015

Mother's Day mini album

I made my Mother-in-law a cute mini album for Mother's day.  She always wants pictures of the kids but likes good old fashioned hard copies.  Which is something I can appreciate.  I've never made my own before but thought I'd give it a shot.  I kept the colors more neutral with some glacier as an accent color.  I mixed patterns since I kept all the colors similar.  I also used some gold polka dot washi tape.  The paper was cut to 6x12 and attached together by washi tape.  


Here I stamped all the images and then went over them with liquid glass.


This is the inside, I used the washi to create a couple flaps for additional photos.


  I used double sided paper so that helped with coordinating the paper.  This is the backside.  I used liquid glass to secure the ribbon under the back cover.


Just a few of the pictures that I included in the album.


Overall this album wasn't really difficult and would be very easy for a beginner.  *Here's a tip too:  I don't have a score board yet so I did improvise by using the groove of my paper cutter and a boning tool.  

Tuesday, June 9, 2015

Teacher Thank you cards

It's been forever since I've posted anything and honestly I haven't had a chance to work on much since April.  The end of April and all of May are usually busy, but this year was insane!  Filled with Birthdays (two of the littles plus mine), a girls trip, our Anniversary, Mother's day, a Wedding, a graduation party, football and baseball.

So that brings us to June.  My kids have a day and a half left of school.  As in, 11:45 Thursday, they are done for the summer!  So nothing like waiting until the last minute to make some Thank you cards for their teachers.

This was my current desk situation today. 


Since I'm still fairly new to stamping, I like to practice before I stamp directly onto my project.  I'm actually really glad I did too, because I'm still figuring out which color is the best to stamp first the lighter or darker.  Plus it helped to season this new stamp set.  This is what I came up with and I really like it!  


 First, the card is 5 1/2" x 5 1/2".  I cut the base yellow piece 5" x 5".  The white stamped piece is 4.75" x 4.75".  For the stamping I stamped the lighter, petal colors first.  Then stamped the outline in black.  I love the look of this it almost reminded me of the way water colors look.  My stamping was a little off on the pink but improved with the other ones!


To make the outline stamping easier I would look for a point that stands out to you and focus on that.  For me it was the curved tip on the bottom petal.


I used a small bit of liquid glass behind the knot to keep it in place.  Then foam adhesive to pop it off the background.

Hope you enjoyed this!


Supplies I used for this project:

A Budding friendship                           Have a Happy day                    Glacier
       

Canary                                                      Pixie                                               Black